By Duane Benson
 The first answer to that question is probably going to be along the lines of, “put them on the board.” But sometimes you can’t have reference designators on your board. Maybe it’s too densely populated and there isn’t room. Maybe, for aesthetic reasons, you’ve chosen to leave them off.
With some products, like development boards, it’s sometimes necessary to use the space for instruction or functional identification and reference designators would confuse your customers. It’s always best to put reference designators as close to the part as possible, and on the same side as the part. But if that’s not possible, you can still create an assembly drawing. When laying out the board, put the reference designators in a different layer than the text you want in silk screen.
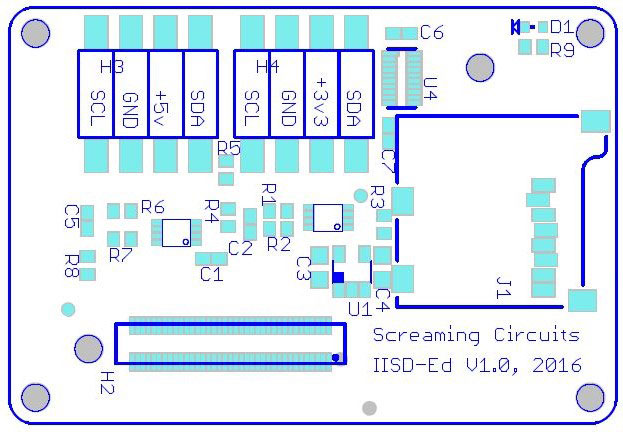
Then, create a PDF that has all of the component outlines in their place, with reference designators. Make one for the top and one for the bottom. Call this document your “assembly drawing” and include it in the files you send in to be manufactured.
The image here shows a good assembly drawing format. It’s got reference designators and polarity marks. You might ask why we need reference designators when all the surface mount parts are machine assembled. First, any thru-hole parts are hand assembled. Their locations and board side needs to be clear for the people stuffing them.
Second, CAD systems don’t always have 100 percent accurate information. If the center point of the footprint is off, surface mount machines will center the part where the file says to put it, which, in this case, would be the wrong spot. The reference designators are also part of quality control. It’s another opportunity to remove ambiguity. Ambiguity bad. Certainty good.
Duane Benson is the Chief Technology Champion at Screaming Circuits, a prototype PCB assembly electronic manufacturing company in Canby, Oregon.


